Thursday, July 9, 2015

The Orchid clone


Last year, this was a real game changer for me.  It seems like it was so long ago but it was less than a year when I first discovered the Orchid clone.  I used it in stock from for a few weeks until I started to mod it/ them.  I will show you the progression in which I started to modify the orchid.  I read a signature of someone on the fasttech forums that the orchid isn't an atomizer, it is a platform or something to that effect.  To me it really is.  There are so many ways to customize it to your liking.

The first thing I did was to drill out the stock air holes to 2.6mm. I have read that others have drilled theirs out to 3mm but I haven't had such luck. Maybe I was letting the drill bit get too hot. I did drop a few drops of e-juice, as lube, in the holes before I drilled but maybe I just need to take it slower and use more lube.


I was getting tired of filling from the bottom which in itself isn't that bad but for fear of losing the screw and having to carry a screwdriver to fill up was getting old. This was when the Kayfun V4 came out and a few people who bought one tried to use the evaporation chamber on the orchid. Success, it fit perfectly and wicked just as good if not better than the stock chimney of the orchid. 

I was using this setup with a bellcap which worked out great, I just had to be careful with my choice of juice because certain juice will crack the tank. I figured since the Kayfun V4 tank only attaches to the evaporation chamber, I said why not. It uses either a SS tank section or glass. So I bought a Kayfun V4 top tank and used a Kayfun top cap.
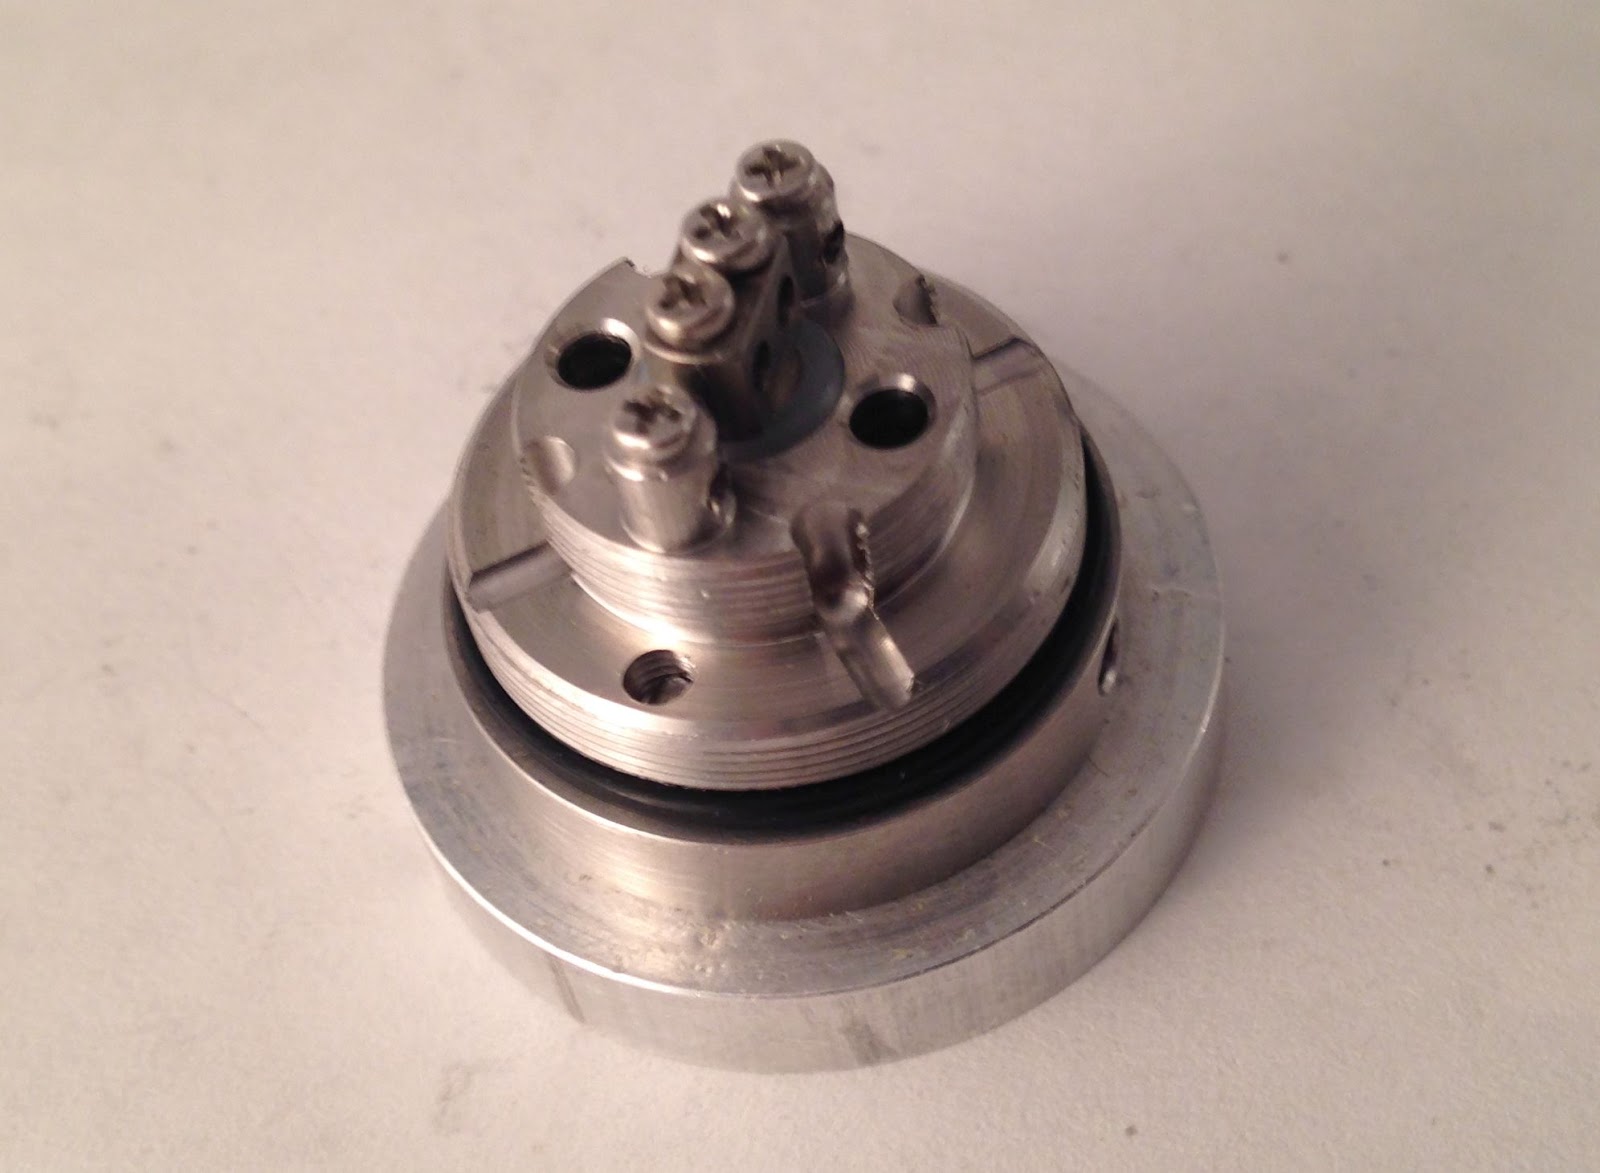
It worked fine for me for a few months but wanted a more leak proof fast wicking tank. This is where I took the base to the mill I had at my last job. I milled out the vertical and horizontal juice channels. I have read some people have used dremels to do this task but haven't tried myself. As you can see the channels are huge now and you can stuff the thickest pieces of cotton in there so say goodbye to leaking tanks.


This where my orchids are at today. There are plenty of other new rebuildable tanks that have come out since, but I stick to my orchids. It fits my needs and is fairly cheap. I hope you enjoyed this weeks blog post. Enjoy.

-Eric


Thursday, July 2, 2015

Fasttech Nemesis Clone Mods to fix crunchy switch throw.

***Disclaimer:  I'm not responsible for damage you do to your device or harm to yourself from doing these mods.  This is just simply what I do and should not be taken as official.  When using a Hybrid cap/ style mod, you have to make sure the center pin protrudes enough where it will clear the threading so only the center pin comes in contact with the battery.  Please be careful and be safe.***

As promised, here are the mods I do to the Nemesis clone from Fasttech.  In the beginning, it seemed that the tubes themselves have been too short causing an extremely long throw thus putting the switch cap far enough out to catch on the end of the mod tube.  This is where the crunchiness comes from.  Somewhere along the line, they have lengthened the tube so that the switch will now thread all the way into the tube and bottom out and you are unable to depress the switch at all.  In this case all you would have to do is back the firing pin out a bit until you get a short throw and avoid the crunchiness all together.  Simple easy fix.

Now, if you own an older or shorter tube, this will be how to fix the crunchiness.  As stated before, I have swapped the 510 center pin for the firing pin and all together did away with the top cap.  You will first have to disassemble the switch and make sure not to lose the little pin (rice pin) it is very important that you don't lose this.  If you will be switching to magnets, this is the time to replace the spring with them.  If you chose to use the spring, that is fine too.  It won't affect the way the switch performs mechanically.  Some have reported electrically it conducts and gets hot, but I have never used a nemesis with a spring so I can't comment on that.

First off I take the Delrin (this one is black but can be done with the white Delrin as well) and sand about half of it off.  Then I take the firing pin and sand it down so when assembled it will sit below the upper most part of the sanded Delrin.  If not sanded it will cause an auto fire as soon as you assemble the mod.

At this point it's ready for assembly.  If you are going to put in magnets, now is the time to do it.
here are the magnets that I used.
Now that you have it assembled again, you can fine tune with the same method I talked about above.  if you sanded too much, you can back the firing pin out and dial in the switch to where you get a nice short throw and no crunchiness.

To finish up the mod, I use a hybrid cap also from Fasttech.  it just shortens the mod and puts the atomizer center pin in direct contact with the battery.  Beware that the 510 pin protrudes enough where the threads won't come in contact with your battery or you will cause a hard short and possibly battery venting or worse.


There you have it.  Those are the mods I do to my Nemesis Clone from Fasttech.  Again, I buy my Nemesis clones from fasttech because I know the hybrid caps will fit properly.  I have two Nemesis clones from other vendors which the hybrid cap from fasttech did not fit.

Remember, be careful when using a hybrid cap because if not setup properly, you can get seriously hurt or worse.